Unlocking the Silence: Troubleshooting Outlook Notifications in Windows 11
Related Articles: Unlocking the Silence: Troubleshooting Outlook Notifications in Windows 11
Introduction
In this auspicious occasion, we are delighted to delve into the intriguing topic related to Unlocking the Silence: Troubleshooting Outlook Notifications in Windows 11. Let’s weave interesting information and offer fresh perspectives to the readers.
Table of Content
Unlocking the Silence: Troubleshooting Outlook Notifications in Windows 11

In the bustling digital landscape of today, staying connected and informed is paramount. Email remains a vital communication channel, and Outlook, a widely used email client, plays a crucial role in this connectivity. However, a common frustration arises when Outlook notifications, designed to alert users to incoming messages and other critical updates, inexplicably cease functioning. This can lead to missed deadlines, forgotten appointments, and a general sense of disconnection.
This article explores the intricacies of Outlook notifications in Windows 11, delving into the common causes behind their malfunction and providing a comprehensive guide to troubleshooting and restoring seamless communication.
Understanding the Importance of Outlook Notifications
Outlook notifications serve as the digital messengers, keeping users informed about incoming emails, calendar events, and other critical information. Their importance lies in:
- Timely Communication: Notifications ensure users are promptly alerted about new messages, preventing delays in responses and ensuring timely action.
- Enhanced Productivity: By proactively alerting users to important events and messages, notifications streamline workflows and minimize distractions, fostering a more focused and productive environment.
- Improved Collaboration: Notifications play a key role in facilitating collaboration, ensuring team members are aware of updates, requests, and other pertinent information.
- Enhanced Awareness: Notifications keep users informed about critical updates, calendar events, and other important information, fostering a sense of control and preparedness.
Common Causes of Outlook Notification Failure
The failure of Outlook notifications in Windows 11 can stem from various factors, including:
- System Settings: Incorrect or disabled notification settings within Windows 11 can prevent Outlook from delivering alerts.
- Outlook Configuration: Issues with Outlook’s notification settings, including incorrect or disabled options, can lead to notification failure.
- Software Conflicts: Third-party applications or outdated software may interfere with Outlook’s notification functionality.
- Network Connectivity: Poor internet connection or network issues can hinder the delivery of Outlook notifications.
- System Resources: Insufficient system resources, such as memory or processing power, can impact the performance of Outlook and its notification capabilities.
- Windows Updates: Recent Windows updates may have introduced changes that affect Outlook’s notification behavior.
- Firewall or Antivirus Software: Overly restrictive firewall or antivirus settings may block Outlook’s notification delivery.
- Corrupted Outlook Data: Damaged Outlook files or corrupted data can lead to various malfunctions, including notification issues.
Troubleshooting Outlook Notifications: A Step-by-Step Guide
Addressing the silence of Outlook notifications requires a systematic approach. Here’s a comprehensive guide to troubleshoot and restore notification functionality:
-
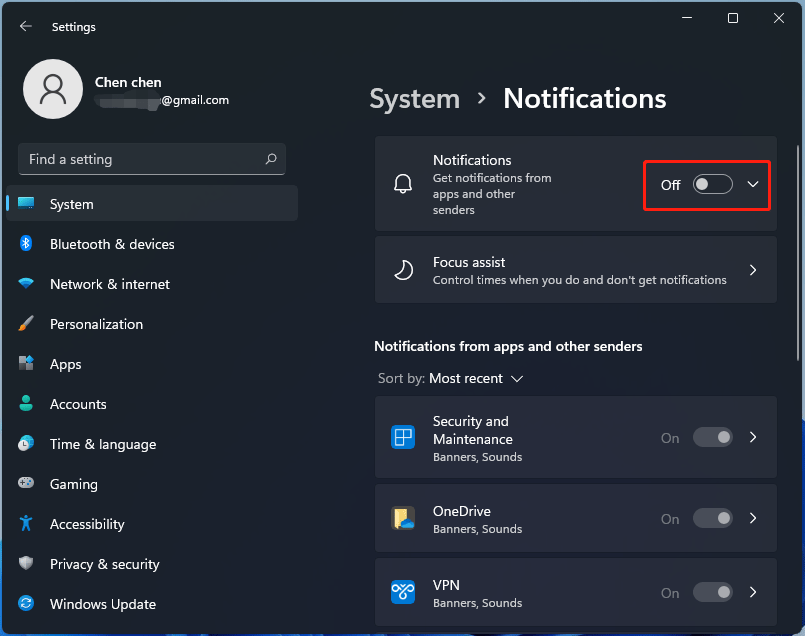
Verify Windows Notification Settings:
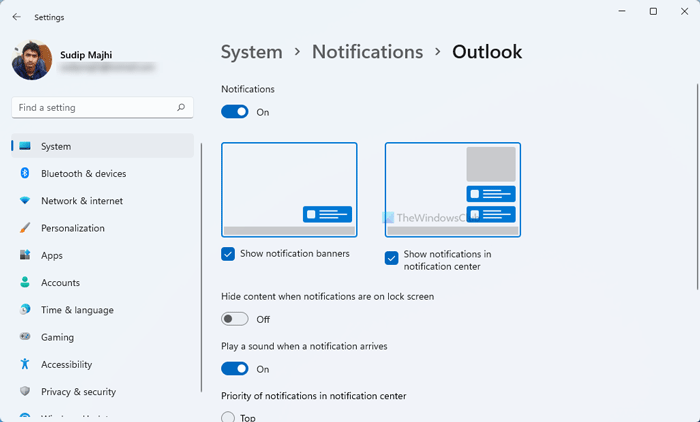
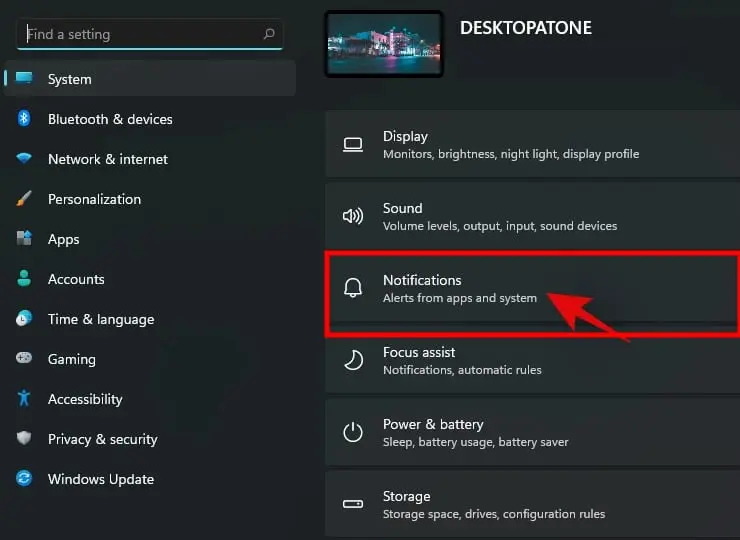
- Access Settings: Open the Windows Settings app by pressing the Windows key + I.
- Navigate to System: Select "System" from the left-hand menu.
- Choose Notifications: Click on "Notifications" in the right pane.
- Ensure Notifications are Enabled: Verify that the "Notifications" toggle is turned on.
- Check for App-Specific Settings: Scroll down to "Get notifications from these senders" and ensure Outlook is listed and enabled.
-
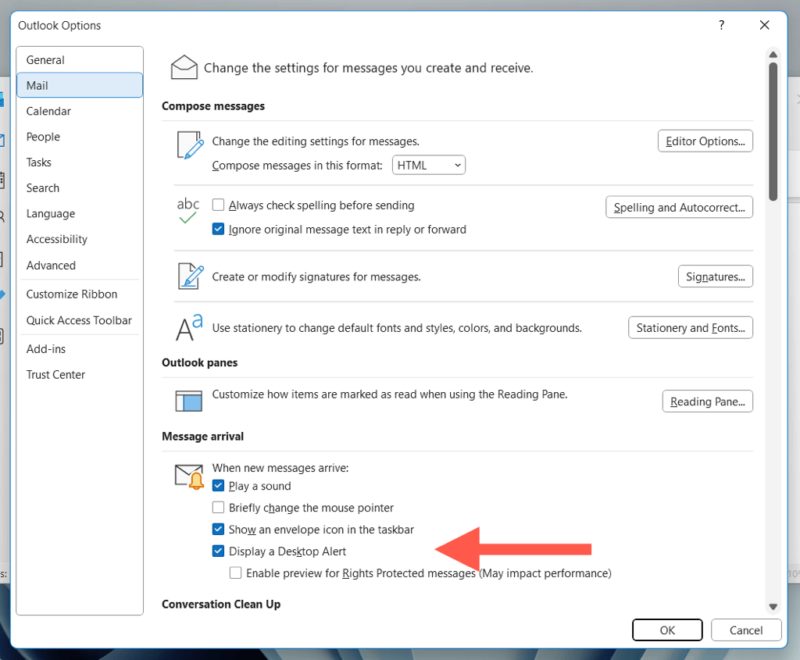
Adjust Outlook Notification Settings:
- Open Outlook: Launch the Outlook application.
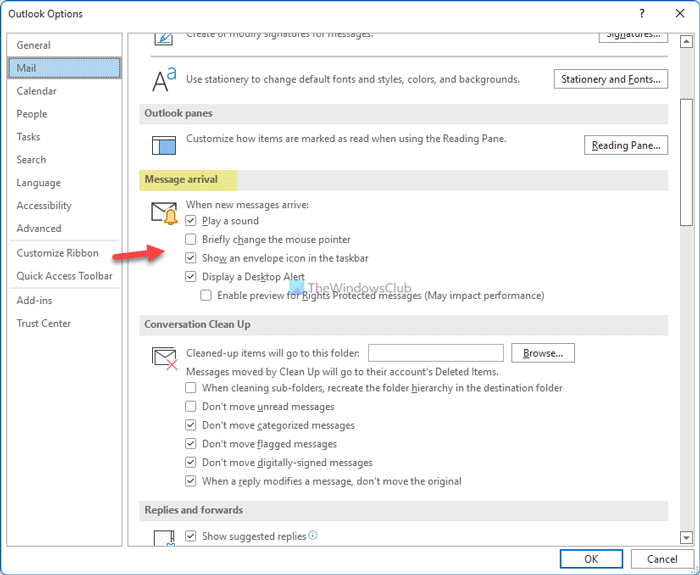
- Access Options: Click "File" in the top menu and select "Options."
- Navigate to Mail: Choose "Mail" from the left-hand menu.
- Select Notifications: Click on "Notifications" in the right pane.
- Verify Notification Options: Ensure that the desired notification options are enabled, including "Desktop Alerts" and "Show a notification when new mail arrives."
- Customize Settings: Adjust notification settings according to preferences, such as the frequency and type of alerts.
-
Check for Software Conflicts:
- Identify Potential Conflicts: Consider recently installed applications or updated software that might interfere with Outlook’s notification functionality.
- Temporarily Disable Conflicting Software: Temporarily disable or uninstall suspected applications to isolate the issue.
- Restart Outlook and Windows: After disabling or uninstalling software, restart Outlook and Windows to ensure changes take effect.
-
Verify Network Connectivity:
- Check Internet Connection: Ensure a stable internet connection.
- Test Network Performance: Run a network speed test to diagnose potential bandwidth limitations.
- Restart Router or Modem: Restarting your router or modem can resolve temporary network issues.
-
Manage System Resources:
- Close Unnecessary Programs: Close applications that are not in active use to free up system resources.
- Check System Performance: Monitor system performance metrics, such as memory and CPU usage, to identify potential resource constraints.
- Optimize System Settings: Consider adjusting system settings, such as reducing visual effects, to improve performance.
-
Update Windows and Outlook:
- Install Latest Windows Updates: Ensure that Windows is up-to-date with the latest updates by navigating to "Settings" > "Update & Security" > "Windows Update."
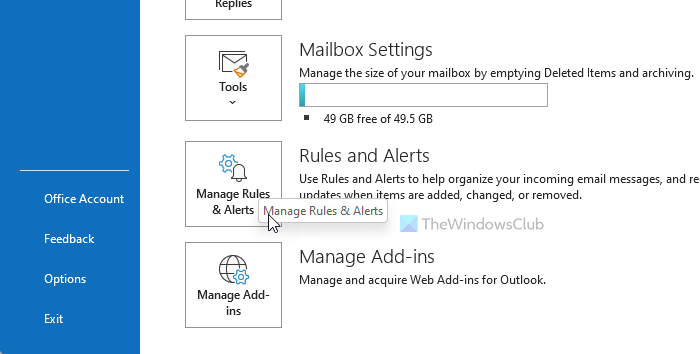
- Check for Outlook Updates: Update Outlook to the latest version by accessing "File" > "Office Account" > "Update Options" > "Update Now."
-
Review Firewall and Antivirus Settings:
- Access Firewall Settings: Open the Windows Firewall settings by searching for "Windows Firewall" in the Start menu.
- Check Outlook Permissions: Ensure that Outlook is allowed through the firewall.
- Temporarily Disable Antivirus: Temporarily disable your antivirus software to see if it’s interfering with Outlook notifications.
-
Repair Outlook Data:
- Run Inbox Repair Tool (Scanpst.exe): This tool can repair corrupted Outlook data files.
- Location of Scanpst.exe: The Scanpst.exe tool is typically located in the following path: "C:Program Files (x86)Microsoft OfficerootOffice16" or "C:Program FilesMicrosoft OfficerootOffice16" (depending on your Office installation).
- Run the Tool: Double-click the Scanpst.exe file and follow the on-screen instructions.
Frequently Asked Questions (FAQs)
Q: Why am I not receiving Outlook notifications even though my settings are correct?
A: This could be due to various factors, such as software conflicts, network issues, or system resource constraints. Follow the troubleshooting steps outlined above to diagnose and address the underlying cause.
Q: How can I troubleshoot Outlook notifications if I’m not receiving any at all?
A: Start by verifying your Windows and Outlook notification settings. Ensure that notifications are enabled for both Windows and Outlook, and check for any conflicting applications or settings.
Q: What if I’m only receiving notifications for certain emails?
A: This could indicate a problem with the specific sender or email category. Check your Outlook rules and filters to ensure they are not blocking notifications for specific emails.
Q: How can I ensure that my Outlook notifications are working correctly?
A: Test your notification settings by sending yourself a test email or scheduling a calendar event. If you receive a notification, your settings are likely working correctly.
Tips for Enhancing Outlook Notifications
- Customize Notification Sounds: Assign unique sounds to different types of notifications to easily distinguish between incoming emails, calendar events, and other alerts.
- Utilize Notification Groups: Group notifications by sender or category to streamline information flow and prioritize important alerts.
- Enable Priority Notifications: Designate specific senders or email categories as priority, ensuring that their notifications are always delivered.
- Optimize Notification Frequency: Adjust the frequency of notifications based on individual needs and preferences, avoiding notification overload.
Conclusion
Restoring Outlook notifications in Windows 11 involves a methodical approach, systematically addressing potential causes and implementing appropriate solutions. By understanding the importance of notifications, recognizing common causes of failure, and following the troubleshooting steps outlined in this article, users can reclaim seamless communication and maintain a connected and productive digital environment. Through proactive troubleshooting and careful configuration, the silence of Outlook notifications can be broken, ensuring that crucial information is delivered promptly and effectively.

Closure
Thus, we hope this article has provided valuable insights into Unlocking the Silence: Troubleshooting Outlook Notifications in Windows 11. We hope you find this article informative and beneficial. See you in our next article!