Rejuvenating Your Windows 11: A Comprehensive Guide to Using a USB Installation Drive
Related Articles: Rejuvenating Your Windows 11: A Comprehensive Guide to Using a USB Installation Drive
Introduction
With great pleasure, we will explore the intriguing topic related to Rejuvenating Your Windows 11: A Comprehensive Guide to Using a USB Installation Drive. Let’s weave interesting information and offer fresh perspectives to the readers.
Table of Content
Rejuvenating Your Windows 11: A Comprehensive Guide to Using a USB Installation Drive
Windows 11, the latest iteration of Microsoft’s operating system, offers a plethora of features and enhancements. However, like any software, it can experience issues over time. These issues can range from slow performance and application crashes to malware infections and data corruption. In such scenarios, a clean installation of Windows 11 can be the most effective solution, restoring your system to a pristine state and resolving the underlying problems.
This guide will delve into the process of creating and utilizing a Windows 11 installation USB drive, providing a comprehensive understanding of its significance and steps involved.
Understanding the Importance of a Windows 11 Installation USB Drive
A Windows 11 installation USB drive is essentially a portable version of the operating system. It acts as a bootable medium, enabling you to install or reinstall Windows 11 on your computer without relying on an existing operating system. This is crucial for various reasons:
- Clean Installation: A USB drive allows for a fresh, clean installation of Windows 11, removing any pre-existing software, configurations, and potentially harmful files. This eliminates potential conflicts and performance issues, providing a streamlined and optimized system.
- Troubleshooting and Repair: When encountering major system errors or malware infections, a clean installation can be the only way to restore functionality. A USB drive offers a reliable way to bypass the corrupted system and initiate a fresh install.
- Upgrading from Older Versions: If upgrading from an older Windows version, a USB drive facilitates a smooth and controlled transition to Windows 11. It ensures a complete and accurate installation, minimizing potential compatibility issues.
- System Recovery: In case of a hard drive failure, a USB drive provides a convenient method to reinstall Windows 11 on a new drive, preserving your essential data and settings.
Creating a Windows 11 Installation USB Drive
Creating a Windows 11 installation USB drive is a straightforward process. You will need:
- A USB drive: Ensure it has at least 8GB of free space. Format the drive to NTFS before proceeding.
- Windows 11 ISO file: You can download this from Microsoft’s official website.
- A working computer: This computer should have an internet connection and a USB port.
Steps to Create a Windows 11 Installation USB Drive:
- Download the Windows 11 ISO file: Visit the Microsoft website and download the ISO file for Windows 11.
- Open the Windows 11 ISO file: Right-click on the downloaded file and select "Mount". This will mount the ISO file as a virtual drive.
- Use a USB drive creation tool: There are various tools available for creating a bootable USB drive, including the Microsoft Media Creation Tool and Rufus. Download and install the chosen tool.
- Run the USB drive creation tool: Launch the tool and select the Windows 11 ISO file as the source. Choose the USB drive as the destination and ensure the settings are correct.
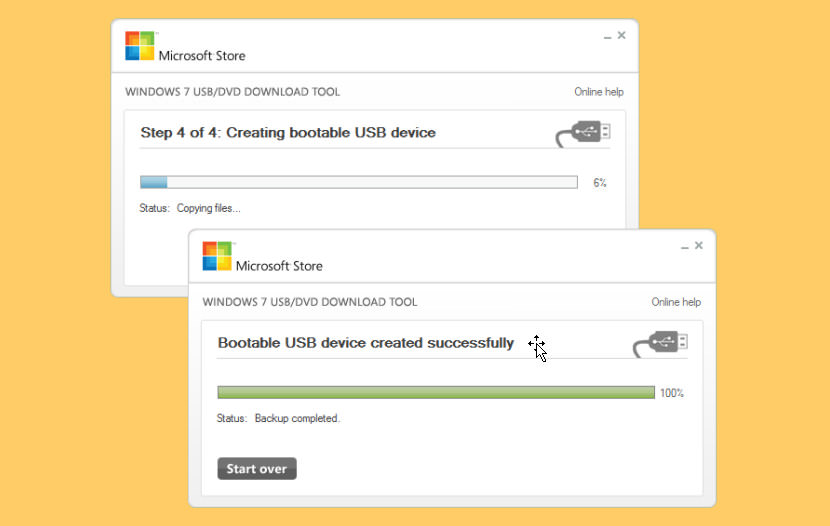
- Start the process: Click "Create" or "Start" to begin creating the bootable USB drive. The process may take some time.
- Verify the USB drive: Once the process is complete, verify that the USB drive is bootable. You can try booting from it on another computer to confirm.
Installing Windows 11 Using the USB Drive
Once you have a bootable USB drive, you can proceed with installing Windows 11 on your computer.
Steps to Install Windows 11:
- Boot from the USB drive: Restart your computer and access the BIOS settings. Configure the boot order to prioritize the USB drive.
- Start the installation process: The Windows 11 setup will launch automatically. Follow the on-screen instructions to select your language, keyboard layout, and other settings.
- Choose "Custom: Install only Windows (advanced)": This option allows you to perform a clean installation, removing all previous data and settings.
- Select the drive for installation: Choose the drive where you want to install Windows 11. Ensure that you have backed up all important data before proceeding.
- Complete the installation: The installation process will take some time. Once complete, your computer will restart, and you will be greeted with the Windows 11 desktop.
FAQs
Q1: What is the difference between a clean installation and an upgrade?
A clean installation involves removing all existing data and settings, effectively starting fresh with Windows 11. An upgrade retains some settings and data, but may encounter compatibility issues with older software or drivers.
Q2: Can I use a Windows 11 installation USB drive to upgrade my existing Windows 10 installation?
No, a Windows 11 installation USB drive is designed for clean installations. To upgrade from Windows 10, use the Windows Update feature or the Microsoft Media Creation Tool.
Q3: Can I create a bootable USB drive without the Windows 11 ISO file?
No, you need the Windows 11 ISO file to create a bootable USB drive.
Q4: What happens to my data during a clean installation?
A clean installation will erase all data on the selected drive. Ensure you have a backup of important files before proceeding.
Q5: Can I use the same USB drive to install Windows 11 on multiple computers?
Yes, you can use the same USB drive to install Windows 11 on multiple computers. However, ensure that the drive is compatible with the target computer’s BIOS settings.
Tips for Reinstalling Windows 11
- Backup your data: Before proceeding with a clean installation, ensure you have a complete backup of all important data. This includes files, documents, photos, and any other essential information.
- Check for compatibility: Ensure that your hardware is compatible with Windows 11. You can find a list of supported hardware on the Microsoft website.
- Prepare for the installation process: Gather any necessary drivers and software that you may need after the installation.
- Use a reliable USB drive: Choose a high-quality USB drive that is known for its reliability. Avoid using cheap or damaged drives.
- Be patient: The installation process can take some time, especially for a clean installation. Avoid interrupting the process or shutting down your computer.
Conclusion
Reinstalling Windows 11 using a USB drive can be a powerful tool for resolving system issues, upgrading to the latest version, or restoring your computer to a pristine state. By understanding the process and following the steps outlined in this guide, you can ensure a smooth and successful installation, rejuvenating your system and maximizing its performance. Remember to back up your data and prepare for the installation process to ensure a seamless transition.
![How to Install Windows 11 From USB Drive [ Full Guide ]](https://www.buildsometech.com/wp-content/uploads/2021/07/How-to-Install-Windows-11-From-USB-Flash-Drive.png)
![How to Install Windows 11 from USB in 2021 [Easiest Guide] Beebom](https://beebom.com/wp-content/uploads/2021/08/How-to-Install-Windows-11-From-USB-on-Your-PC-1.jpg?w=750u0026quality=75)


Closure
Thus, we hope this article has provided valuable insights into Rejuvenating Your Windows 11: A Comprehensive Guide to Using a USB Installation Drive. We appreciate your attention to our article. See you in our next article!