Capturing the Screen and Beyond: A Guide to Recording with Camera in Windows 11
Related Articles: Capturing the Screen and Beyond: A Guide to Recording with Camera in Windows 11
Introduction
In this auspicious occasion, we are delighted to delve into the intriguing topic related to Capturing the Screen and Beyond: A Guide to Recording with Camera in Windows 11. Let’s weave interesting information and offer fresh perspectives to the readers.
Table of Content
Capturing the Screen and Beyond: A Guide to Recording with Camera in Windows 11
:max_bytes(150000):strip_icc()/Captureannotated-e128cac9ada949aba4a8322746ac1e0f.jpg)
Windows 11 offers a robust suite of tools for capturing and sharing digital content, empowering users to create engaging and informative presentations, tutorials, and demonstrations. One particularly powerful feature is the ability to record the screen alongside a live camera feed, seamlessly integrating visual and audio elements for a more comprehensive and engaging experience. This capability finds application in diverse scenarios, ranging from educational content creation and online tutorials to personal presentations and collaborative projects.
This article delves into the intricacies of recording the screen with a camera in Windows 11, exploring the available tools, outlining the steps for successful recording, and addressing common questions and concerns.
Understanding the Benefits
Integrating a camera feed into screen recordings offers several distinct advantages:
- Enhanced Engagement: The inclusion of a presenter’s face fosters a sense of connection and personalizes the content. This is particularly valuable for tutorials, presentations, and online courses, where visual cues and facial expressions can enhance clarity and understanding.
- Comprehensive Content: Combining screen activity with a live camera feed creates a richer and more informative experience. This allows viewers to follow along with on-screen actions while simultaneously observing the presenter’s reactions, explanations, and gestures.
- Versatility: The ability to record both screen and camera opens up a wide range of creative possibilities. Users can create engaging product demonstrations, personalized tutorials, and even interactive video blogs.
- Accessibility: For individuals with visual or auditory impairments, the combination of visual and audio elements can enhance accessibility and comprehension.
Tools at Your Disposal
Windows 11 provides two primary methods for capturing screen recordings with a camera:
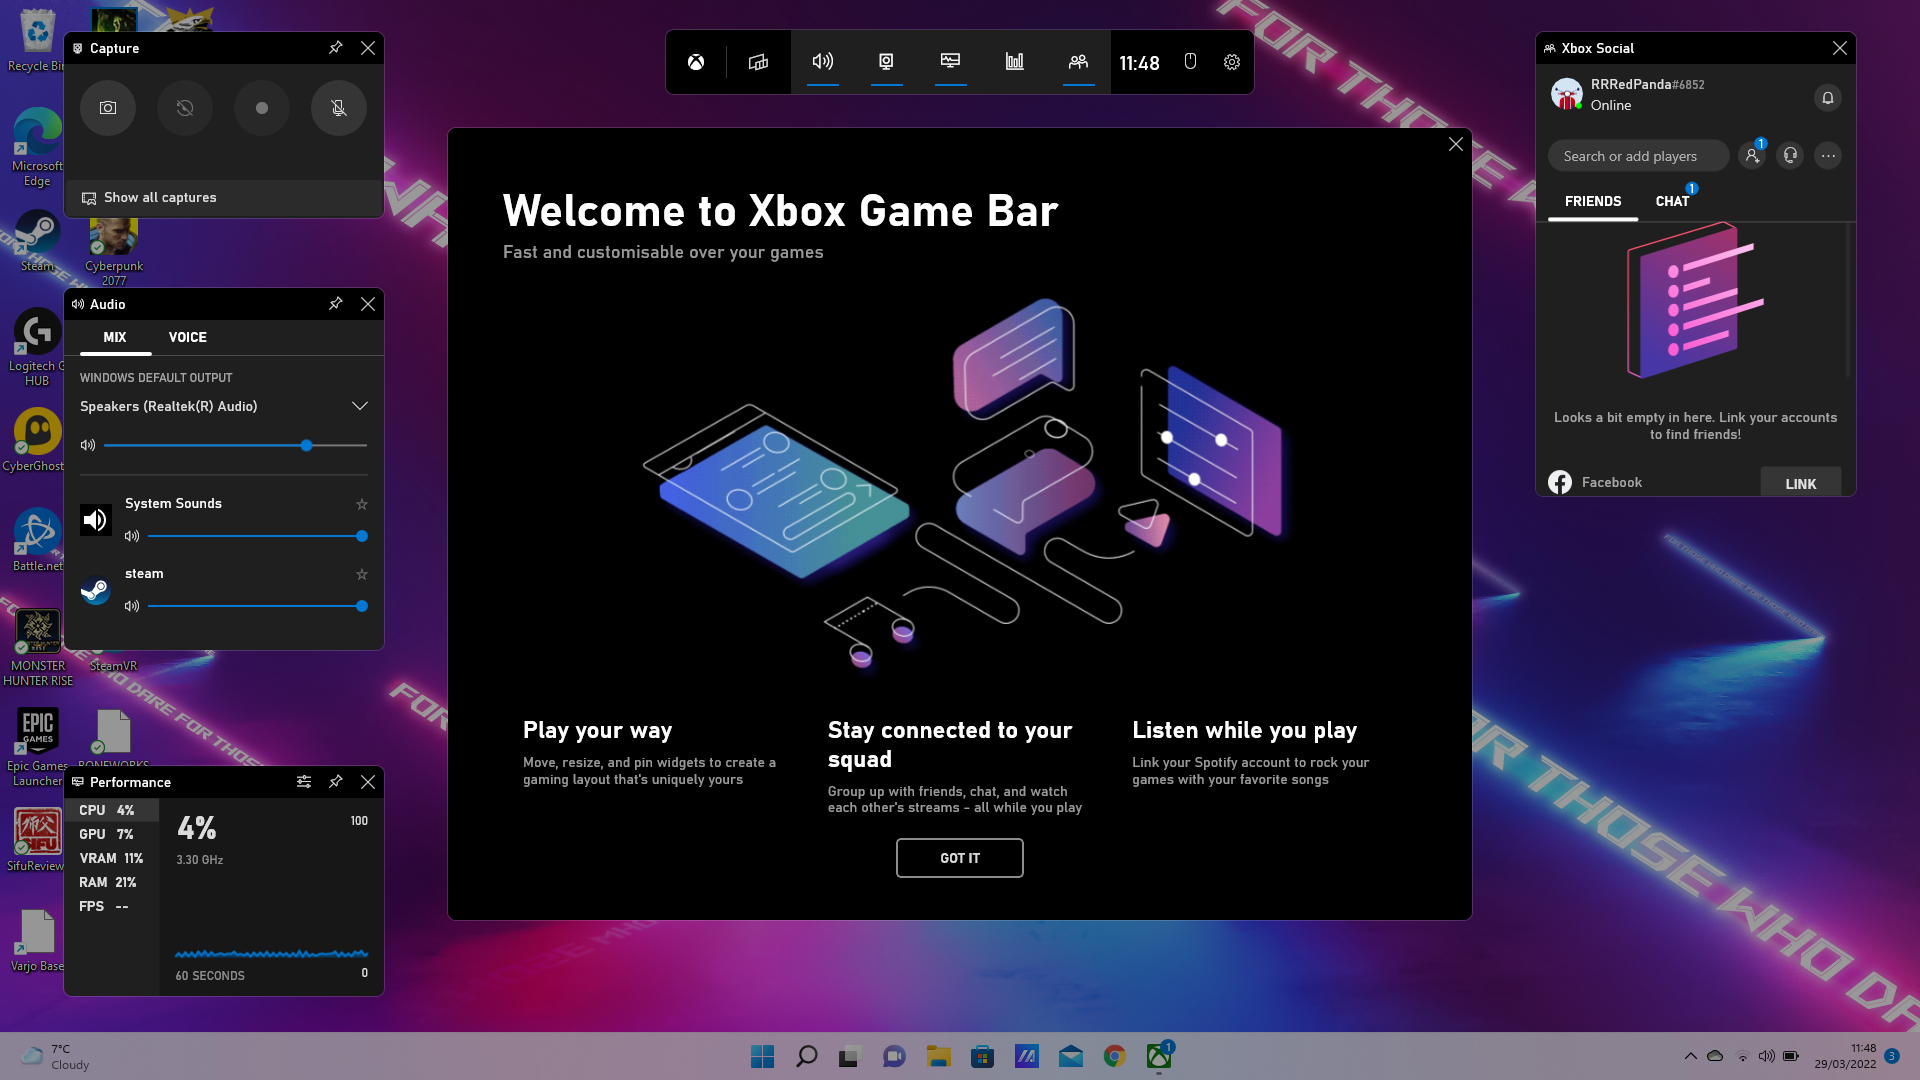
- Xbox Game Bar: This built-in application, accessible through the Windows key + G shortcut, offers a user-friendly interface for recording gameplay and other screen activities. It includes a dedicated option for incorporating a camera feed, allowing users to capture both screen and webcam simultaneously.
- Third-Party Software: Numerous third-party applications offer more advanced features and customization options for screen recording. These tools often provide greater control over video quality, editing capabilities, and output formats. Popular choices include OBS Studio, Camtasia, and Bandicam.
Step-by-Step Guide to Recording with Camera
Using Xbox Game Bar:
- Launch Xbox Game Bar: Press the Windows key + G to activate the Xbox Game Bar overlay.
- Enable Camera: Navigate to the "Capture" tab within the Xbox Game Bar and select the "Camera" icon.
- Choose Camera Source: If multiple cameras are connected, select the desired camera from the dropdown menu.
- Adjust Camera Settings: Fine-tune camera settings such as resolution, frame rate, and field of view to optimize the recording quality.
- Start Recording: Click the "Record" button to commence capturing the screen with the camera feed.
- Stop Recording: Press the "Stop Recording" button to end the recording session.
- Access Recording: The recorded video will be saved in the "Captures" folder located within your "Videos" directory.
Using Third-Party Software:
- Install and Launch Software: Download and install the desired third-party screen recording software.
- Configure Camera: Within the software’s settings, locate the camera settings and select the desired camera source.
- Adjust Camera Settings: Customize camera settings such as resolution, frame rate, and field of view.
- Set Recording Area: Define the area of the screen you wish to capture.
- Start Recording: Initiate the recording process using the software’s designated recording button.
- Stop Recording: Terminate the recording session using the software’s stop recording button.
- Save Recording: The recorded video will be saved in the location specified within the software’s settings.
Important Considerations
- Hardware Requirements: Ensure your computer meets the minimum system requirements for screen recording. This includes sufficient processing power, memory, and storage space.
- Camera Quality: The quality of your camera will directly impact the visual quality of the recorded video. Consider using a high-resolution webcam for optimal results.
- Lighting: Proper lighting is crucial for clear and professional-looking recordings. Ensure adequate lighting for both the screen and your face.
- Background: Choose a clean and uncluttered background to avoid distractions.
- Audio Quality: Ensure your microphone is functioning properly and positioned close to your mouth for clear audio capture.
FAQs
Q: What are the minimum system requirements for recording screen and camera in Windows 11?
A: The minimum system requirements for screen recording with camera depend on the chosen software and recording settings. Generally, a modern computer with a processor capable of handling video encoding and sufficient RAM is recommended.
Q: Can I record my screen with camera without installing any software?
A: While Xbox Game Bar offers a built-in solution, it is limited in features compared to third-party software. For more advanced control and customization, third-party software is recommended.
Q: How do I adjust the size and position of the camera feed in the recording?
A: The specific methods for adjusting camera feed size and position vary depending on the software used. Consult the software’s documentation or settings for guidance.
Q: Can I record my screen with a specific application window instead of the entire screen?
A: Yes, most screen recording software allows you to select a specific application window or region of the screen for recording.
Q: What are the best settings for recording screen and camera?
A: Optimal settings depend on your recording goals and hardware capabilities. Higher resolutions and frame rates produce higher quality videos but require more processing power. Experiment with different settings to find the best balance for your needs.
Tips for Success
- Practice Makes Perfect: Record a few test videos to familiarize yourself with the process and refine your techniques.
- Plan Your Content: Outline your recording content beforehand to ensure a structured and engaging presentation.
- Use a Script: Consider using a script to maintain consistency and avoid forgetting important points.
- Engage with the Audience: Maintain eye contact with the camera and use appropriate gestures and facial expressions to enhance engagement.
- Edit Your Recordings: Use video editing software to enhance your recordings by adding transitions, music, and other effects.
- Optimize File Size: Compress your recordings to reduce file size and make them easier to share.
- Share Your Content: Share your recordings on platforms like YouTube, Vimeo, or social media to reach a wider audience.
Conclusion
Recording the screen with a camera in Windows 11 empowers users to create engaging and informative content for a wide range of purposes. By leveraging the built-in Xbox Game Bar or exploring the advanced features of third-party software, users can seamlessly integrate visual and audio elements, enriching their presentations, tutorials, and demonstrations. With careful planning, proper settings, and a touch of creativity, users can harness this powerful tool to effectively communicate their ideas and captivate their audience.


:max_bytes(150000):strip_icc()/SelectAreaannotated-6992ac327aef4892a61d33427ca86caf.jpg)


Closure
Thus, we hope this article has provided valuable insights into Capturing the Screen and Beyond: A Guide to Recording with Camera in Windows 11. We appreciate your attention to our article. See you in our next article!