A Comprehensive Guide to Installing Windows 11 Pro
Related Articles: A Comprehensive Guide to Installing Windows 11 Pro
Introduction
In this auspicious occasion, we are delighted to delve into the intriguing topic related to A Comprehensive Guide to Installing Windows 11 Pro. Let’s weave interesting information and offer fresh perspectives to the readers.
Table of Content
A Comprehensive Guide to Installing Windows 11 Pro

Installing Windows 11 Pro on a computer is a straightforward process that can be accomplished by users of all technical levels. This comprehensive guide outlines the essential steps involved, providing clarity and detailed instructions to ensure a smooth and successful installation.
Preparing for Installation
Before embarking on the installation process, it is crucial to ensure that the system meets the minimum hardware requirements for Windows 11 Pro. These requirements are designed to guarantee optimal performance and compatibility with the operating system.
System Requirements:
- Processor: 1 gigahertz (GHz) or faster with 2 or more cores on a compatible 64-bit processor or System on a Chip (SoC).
- RAM: 4 gigabytes (GB)
- Storage: 64 GB or larger storage device.
- Graphics Card: Compatible with DirectX 12 or later with WDDM 2.x driver.
- Display: High definition (720p) display that is at least 9 inches diagonally, with 8 bits per color channel.
- Internet Connection: Required for initial setup and to activate Windows.
Backup Data:
Prior to installation, it is highly recommended to back up all essential data. This includes files, documents, photos, and any other critical information stored on the computer. Utilizing external storage devices, cloud services, or backup software ensures data recovery in case of unexpected issues during the installation process.
Creating a Bootable USB Drive:
The installation of Windows 11 Pro typically involves using a bootable USB drive. This drive acts as a portable installation medium, containing the necessary files to install the operating system.
Steps to Create a Bootable USB Drive:
- Download the Windows 11 Pro ISO file: This file can be obtained from Microsoft’s official website.
- Use a USB drive with at least 8 GB of storage: Format the drive to NTFS and ensure it is empty.
- Utilize a tool like Rufus or the Media Creation Tool: These tools allow you to create a bootable USB drive from the downloaded ISO file.
- Follow the on-screen instructions: Select the ISO file and the target USB drive. The tool will format the drive and copy the necessary files.
Starting the Installation
Once the bootable USB drive is created, the installation process can begin.
Steps to Install Windows 11 Pro:
- Connect the bootable USB drive to the computer: Restart the computer and press the appropriate key (often F12 or F10) to enter the boot menu.
- Select the USB drive as the boot device: This allows the computer to boot from the USB drive instead of the hard drive.
- Follow the on-screen prompts: The installation process will begin, guiding you through the initial setup steps.
- Select the language, region, and keyboard layout: This will configure the system’s default settings.
- Accept the license terms: Read and agree to the licensing agreement before proceeding.
- Choose the type of installation: Select "Custom: Install Windows only (advanced)" to perform a clean installation.
- Partition the hard drive: This step involves dividing the hard drive into partitions. If you are performing a clean installation, you will need to create a new partition for Windows 11 Pro.
- Install Windows 11 Pro: The installation process will begin, copying files and configuring the operating system.
- Set up your account: Create a new user account or sign in with an existing Microsoft account.
- Choose your privacy settings: Select the desired privacy settings for the operating system.
- Complete the installation: The installation process will finish, and you will be able to use Windows 11 Pro.
Post-Installation Steps
After successfully installing Windows 11 Pro, several post-installation steps are essential to ensure a smooth and secure computing experience.
Installing Drivers:
Drivers are software programs that enable the computer to communicate with its hardware components. It is crucial to install the appropriate drivers for all hardware devices, such as graphics cards, network adapters, and sound cards.
Updating Windows:
Regularly updating Windows is crucial to maintain system security and stability. Windows Update automatically downloads and installs the latest updates, including security patches and bug fixes.
Installing Software:
After installing Windows 11 Pro, you can install necessary software applications, such as web browsers, productivity tools, and security programs.
Optimizing Performance:
Optimizing Windows 11 Pro can improve its performance and efficiency. This includes adjusting system settings, managing startup programs, and cleaning up the hard drive.
FAQs
Q: What is the difference between Windows 11 Home and Windows 11 Pro?
A: Windows 11 Pro offers additional features and functionalities compared to Windows 11 Home, catering to businesses and power users. These features include:
- Domain Join: Allows joining a corporate network domain for centralized management.
- BitLocker Drive Encryption: Encrypts the entire hard drive for enhanced data security.
- Remote Desktop: Enables remote access to the computer from other devices.
- Hyper-V: Enables virtualization capabilities for running other operating systems within Windows.
- Windows Sandbox: Provides a secure environment for testing untrusted software.
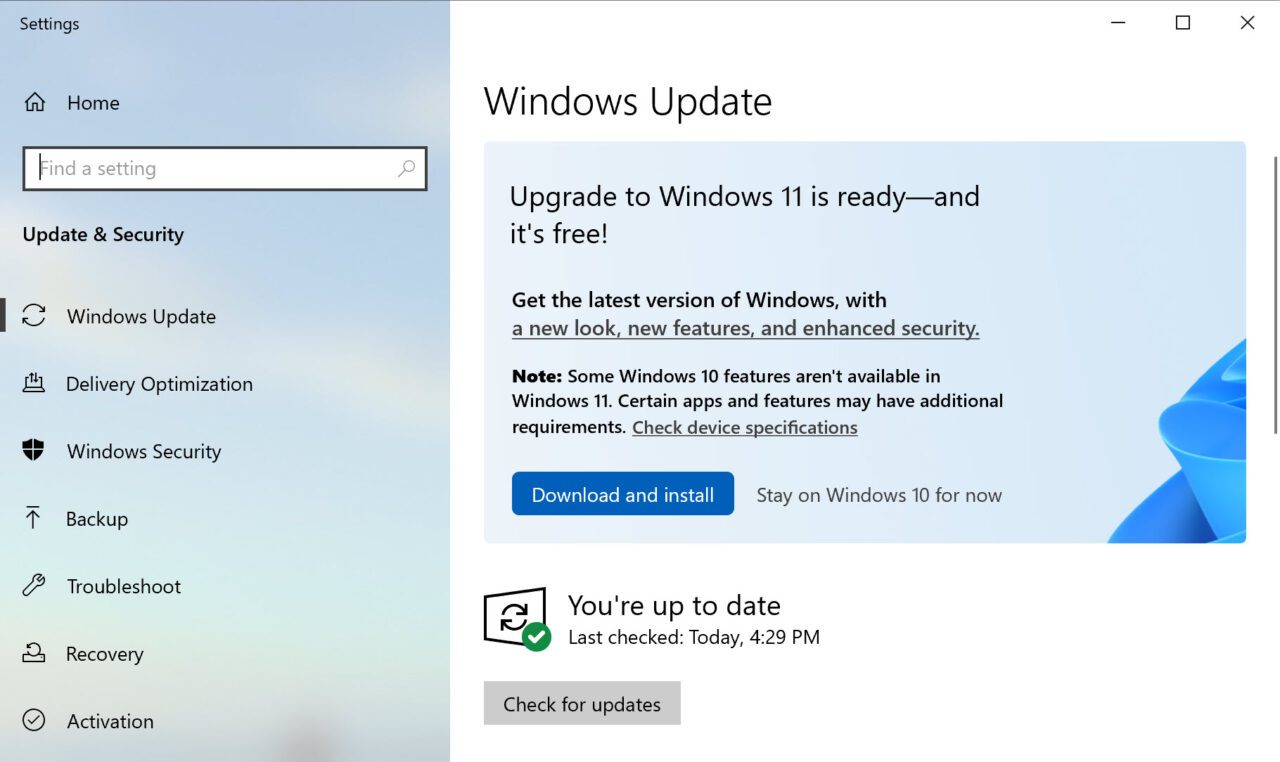
Q: Can I upgrade from Windows 10 to Windows 11 Pro?
A: Yes, you can upgrade from Windows 10 to Windows 11 Pro. However, ensure that your system meets the minimum hardware requirements.
Q: How do I activate Windows 11 Pro?
A: Windows 11 Pro can be activated using a product key. This key is typically provided with the purchase of a new computer or as a separate purchase.
Q: Can I install Windows 11 Pro on a virtual machine?
A: Yes, you can install Windows 11 Pro on a virtual machine. However, you will need a compatible virtualization software, such as VMware Workstation or Oracle VirtualBox.
Tips
- Create a bootable USB drive on a separate computer: This ensures that the installation process is not interrupted by any existing files on the target computer.
- Back up your data before starting the installation: This safeguards your important files in case of any unforeseen issues.
- Check for the latest drivers for your hardware components: Ensure that you have the most up-to-date drivers for optimal performance.
- Run Windows Update after installation: This ensures that you have the latest security patches and bug fixes.
- Consider using a third-party antivirus program: While Windows Defender provides basic protection, a dedicated antivirus program offers enhanced security.
Conclusion
Installing Windows 11 Pro can significantly enhance the user experience, offering improved performance, enhanced security, and a range of advanced features. By following the steps outlined in this guide, users can successfully install Windows 11 Pro, ensuring a smooth and efficient transition to the latest operating system. Remember to back up data, check system requirements, and update drivers for optimal performance and security.


Closure
Thus, we hope this article has provided valuable insights into A Comprehensive Guide to Installing Windows 11 Pro. We thank you for taking the time to read this article. See you in our next article!